

Table of Contents
- Step 1: Declutter and Purge Your Kitchen Cabinets
- Step 2: Categorize and Inventory Your Items
- Step 3: Choose the Right Kitchen Cabinet Organizers
- Step 4: Maximize Vertical Space and Corner Cabinet Storage Ideas
- Step 5: Implement Vertical Storage Kitchen Solutions
- Step 6: Optimize How to Organize Small Kitchen Cabinets for Daily Access
- Step 7: Maintain Your System Long-Term
- Common Mistakes to Avoid When Organizing Cabinets
How to Organize Small Kitchen Cabinets: 7 Proven Steps
Last Updated: July 16, 2026
Learning how to organize small kitchen cabinets transforms cramped, cluttered spaces into functional kitchens where you can actually find what you need. At Smart Buy Shop, we understand that small kitchens demand smart storage solutions, not just more bins. The difference between a kitchen that works and one that frustrates you every morning comes down to strategy, not square footage. Below, we'll walk you through seven practical steps that have helped countless homeowners reclaim their kitchen space and make daily cooking easier.
Step 1: Declutter and Purge Your Kitchen Cabinets
Before you buy a single organizer, you need to clear out what doesn't belong. This step separates successful reorganization from temporary fixes that fail within weeks.
Open every cabinet and remove everything. Yes, everything. Lay items on your counter or table so you can see exactly what you have. You'll likely discover duplicates, broken items, or gadgets you forgot existed. According to research from the National Association of Professional Organizers, most households keep 40% more items than they actually use.
Now make three piles: keep, donate, and trash. Be honest about each item. If you haven't used that specialty kitchen gadget in two years, it's taking up prime real estate. Broken items belong in trash, not in your cabinets waiting for a repair that will never happen. Duplicate measuring spoons, chipped bowls, and expired spices all go.
This purging process typically takes 2-4 hours depending on cabinet size. Don't rush it. The fewer items you keep, the easier the next steps become. You're not just organizing, you're eliminating the problem at its source.
Step 2: Categorize and Inventory Your Items
Now that you've purged, organize what remains into logical categories. This prevents the chaos of random placement and makes your cabinets work like a system instead of a storage dump.
Group similar items together: all mugs in one area, all drinking glasses in another, cooking utensils in a third zone. Keep frequently used items at eye level and within arm's reach. Items you use monthly can go higher or lower. Seasonal or rarely-used items belong in the hardest-to-reach spots.
Create an inventory as you go. Write down what you have and where it lives. This sounds tedious, but it prevents you from buying duplicates and helps everyone in your household find things. A simple spreadsheet or even a handwritten list works fine.
Consider your kitchen workflow. Items you use during meal prep should cluster near your prep area. Dishes used for serving belong near your dining space. Baking supplies should stay together. This logical arrangement means less walking around your kitchen and fewer moments searching for that one thing you know you have somewhere.
Most people find that creating categories reveals patterns. You might discover you have seven coffee mugs but only use two. Or three sets of measuring cups. These insights guide your next purging session and prevent future over-buying.
Step 3: Choose the Right Kitchen Cabinet Organizers
This is where smart organization solutions make the difference between a system that lasts and one that collapses in months.
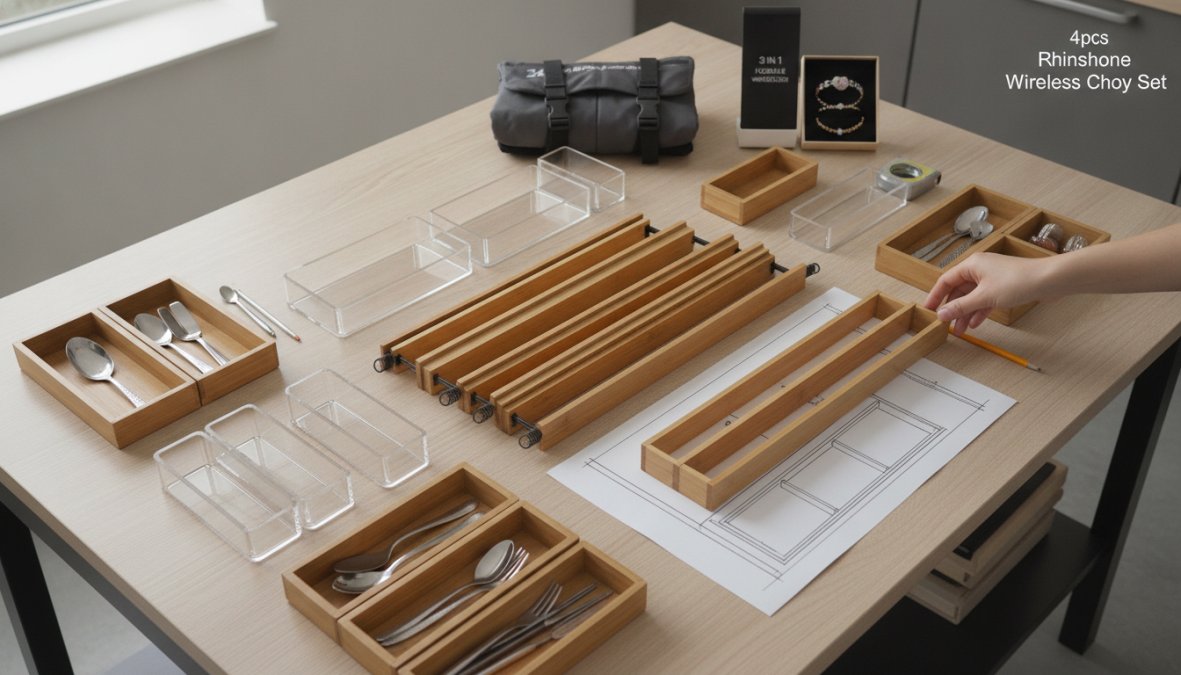
Not all organizers work for every cabinet. Measure your spaces first, cabinet width, depth, and height. Note any obstacles like pipes under the sink or protruding hinges. A beautiful organizer that doesn't fit is worthless.
Drawer Dividers and Inserts
Drawer dividers transform chaotic drawers into organized zones. Adjustable dividers work best because they adapt to your changing needs. Utensil organizers keep cooking tools separated and visible. Drawer inserts for spices, foil, and plastic wrap prevent those drawers from becoming black holes.
Bamboo or wood dividers add durability and look better than cheap plastic. They won't crack or warp over time. For small kitchen drawers, consider tiered inserts that create vertical separation, you can stack utensils without losing visibility.
Stackable Bins and Containers
Clear stackable containers let you see contents without opening them. Label everything. Use consistent labeling so your system stays readable. Containers in matching sizes stack efficiently and look intentional rather than haphazard.
For under-sink storage, stackable bins corral cleaning supplies and prevent spills. Opt for containers with handles, they're easier to pull out and put back. Avoid clear plastic that yellows over time; choose frosted or opaque options if aesthetics matter to you.
Smart Buy Shop offers stackable storage solutions designed specifically for kitchen use. These containers come in graduated sizes that nest together, maximizing vertical space while staying accessible.
Step 4: Maximize Vertical Space and Corner Cabinet Storage Ideas
Small kitchens require vertical thinking. Most people waste the full height of their cabinets by storing items in single layers.
Tiered Shelving and Shelf Risers
Shelf risers double your usable shelf space instantly. A riser creates a second tier on existing shelves, turning one layer into two. This works particularly well for mugs, bowls, and plates. You can store twice as much without adding new cabinets.
Tiered shelving systems with multiple levels fit inside tall cabinets. These metal or bamboo frameworks create 3-4 distinct storage levels. They work best for items you access regularly, not buried treasures.
Adjustable shelf dividers prevent stacks from toppling. A simple bamboo divider keeps plates standing upright instead of sliding around. Your dishes stay organized and you can grab one without the whole stack shifting.
Wall-Mounted Racks and Hooks
The wall above and beside your cabinets represents untapped storage. Magnetic strips hold knives safely and keep them visible. Self-adhesive hooks don't require drilling, perfect for rentals or situations where you can't modify walls.
Over-the-door organizers use space most people ignore completely. Hang them on cabinet doors to store spices, foil, plastic wrap, or frequently-used items. This keeps your counter clear and everything within reach.
Corner cabinets notoriously waste space. Lazy susans or pull-out organizers transform corners from dead zones into accessible storage. Pull-out drawers let you access items at the back without contorting yourself.
Step 5: Implement Vertical Storage Kitchen Solutions
Vertical storage means thinking in three dimensions instead of just side-to-side. Most small kitchens have unused vertical space begging for solutions.
Under-Sink Storage and Pull-Out Drawers
The space under your sink is prime real estate but notoriously difficult to organize. Pipes and irregular shapes make standard shelving impossible. Stackable bins with handles solve this. Pull-out drawers that fit around pipes maximize every inch.
Install a tension rod under your sink to hang spray bottles and cleaning cloths. This keeps bottles from tipping and makes everything visible. Use a small shelf riser to create a second tier for containers and supplies.
Pull-out drawers installed inside cabinets let you access items at the back without reaching. These slide-out organizers work in any cabinet, not just under the sink. They cost more than basic shelving but eliminate the frustration of searching for items buried in the back.
Over-the-Door Organizers
Over-the-door racks use space that typically sits empty. Mount them on the inside of cabinet doors to store spices, foil, plastic wrap, or small containers. This keeps frequently-used items visible and accessible without cluttering shelves.
Choose organizers with clear pockets or compartments so you can see contents at a glance. Avoid over-loading doors, weight pulls hinges out of alignment. Keep items lightweight and frequently used.
For pantry cabinets, over-the-door organizers hold spices efficiently. A tiered spice rack on the door saves shelf space while keeping everything visible and organized.
Step 6: Optimize How to Organize Small Kitchen Cabinets for Daily Access
Organization only works if it supports how you actually use your kitchen. A perfectly organized cabinet that forces you to move three things to reach what you need will fail within weeks.
Kitchen Workflow and Accessibility
Place items where you use them. Store coffee mugs near your coffee maker. Keep cooking utensils near your stove. Store plates and bowls near your dishwasher or dining area. This reduces steps and makes cooking faster.
Eye-level storage should hold your most frequently used items. Heavy items belong lower to prevent strain and injury. Lightweight, rarely-used items can go high. Children should have access to their own dishes and cups at a height they can safely reach.
Accessibility matters more than aesthetics. A beautiful but inconvenient system gets abandoned. A functional system that looks imperfect gets used consistently.
Budget-Friendly DIY Hacks
You don't need expensive organizers to create an organized kitchen. Repurpose items you already have. Mason jars store dry goods and spices beautifully while costing almost nothing. Egg cartons organize small items like tea bags or spice packets. Cardboard boxes lined with contact paper create drawer dividers for pennies.
Tension rods cost under five dollars and hang everything from spray bottles to plastic wrap. Canning jars with chalkboard labels create a cohesive spice storage system for minimal investment. Old wooden crates stack vertically to create rustic shelving.
The Motion Sensor Cabinet Light from Smart Buy Shop (available for $31.99) solves a common problem: you can't see into dark cabinets. This battery-powered light illuminates automatically when you open the door, making it easy to find items without searching. It's a practical upgrade that costs less than buying duplicate items you can't find.
Step 7: Maintain Your System Long-Term
Organization fails when maintenance stops. Build habits that keep your system functional month after month.
Do a quick 10-minute reset every Sunday. Return items to their designated homes. Wipe down shelves. Check for expired items. This weekly maintenance prevents gradual chaos from returning.
Quarterly deep cleans (every three months) catch problems early. You might notice certain items always get shoved in the wrong place, that's a signal to adjust your system. Maybe that item needs a new home closer to where you actually use it.
Inventory annually. What worked last year might not work now. Your cooking habits change. Your household's needs shift. Your organization system should evolve with these changes.
When adding new items, immediately assign them a home. Don't create a "temporary" spot. That temporary spot becomes permanent chaos. New items either fit into your existing system or they don't belong.
Document your system with photos. Take pictures of each organized cabinet. This reference helps family members maintain the system and makes it easy to restore order if things get messy.
Common Mistakes to Avoid When Organizing Cabinets
Most people make predictable mistakes that sabotage their organization efforts.
Buying organizers before purging. This leads to expensive organizers that don't fit your items or your space. Purge first, then measure, then buy organizers.
Ignoring workflow. An organized cabinet that doesn't match how you cook is worse than no organization. Place items where you use them, not where they look neat.
Overcrowding shelves. If items are packed tightly, you can't access anything without moving multiple things. Leave breathing room. If items don't fit comfortably, you kept too much during purging.
Using organizers that don't fit. Measure twice, buy once. A drawer divider that's a quarter-inch too wide creates frustration every time you use it. Verify dimensions before purchasing.
Forgetting about maintenance. Organization requires ongoing effort. Without weekly resets, your system decays. Plan for maintenance from the start.
Storing items you don't use. Sentimental items, gifts you don't like, and "just in case" gadgets take up space. Be ruthless. If it doesn't serve your actual life, it doesn't belong in your kitchen.
Hiding everything away. Some items deserve to stay visible. Frequently-used mugs, cooking utensils, and everyday dishes can live on open shelves or in clear containers. Visibility encourages use and keeps you from buying duplicates.
Small kitchen organization isn't about buying more storage, it's about using what you have more intentionally. The seven steps above work because they address the real problem: too many items in too little space. Start with purging, move through categorization, and invest in organizers that match your actual needs. The Multi-Functional Kitchen Drain Basket from Smart Buy Shop ($13.99) solves another common kitchen pain point, keeping your prep area organized while you work. Maintain your system weekly and adjust quarterly. Within a month, you'll have a kitchen that functions like it was designed for your life, not despite it.
Frequently Asked Questions
How do I maximize space in a small kitchen cabinet?
Maximize space by using tiered shelving, shelf risers, and stackable bins to create vertical layers. Install wall-mounted racks and hooks on cabinet doors. Use drawer dividers to separate utensils and small items efficiently. Consider pull-out drawers for deep cabinets, and add under-sink organizers to capture wasted space. These techniques help you organize small kitchen cabinets without needing extra room.
What are the best kitchen cabinet organizers for small spaces?
Top organizers include drawer dividers for utensil separation, stackable bins for pantry items, lazy susans for corner cabinets, magnetic strips for metal tools, and self-adhesive hooks for hanging items. Tiered shelving maximizes vertical storage, while pull-out drawers improve accessibility in deep cabinets. The SmartGlow Motion Sensor Cabinet Light ($31.99) also helps you see and access items easily in cramped spaces.
How do I organize my small kitchen without a pantry?
Use cabinet depth strategically by installing pull-out drawers and risers to create multiple storage layers. Declutter ruthlessly, remove duplicate items and rarely-used appliances. Use stackable containers and vertical dividers to maximize shelf space. Install over-the-door organizers and wall-mounted racks for additional storage. Create zones within cabinets for different categories (cooking utensils, dishes, small appliances) to maintain kitchen efficiency and workflow.
How often should I reorganize and maintain my cabinet system?
Review your organization system quarterly to ensure it still works for your kitchen workflow. Monthly, spend 10 minutes tidying and restocking containers. After seasonal cooking events or major kitchen changes, reassess your layout. Regular maintenance prevents clutter buildup and keeps your cabinet organization functional long-term. This upkeep ensures your system remains efficient and accessible for daily cooking tasks.
This article was written using GrandRanker


